
How To Draw Guggenheim Museum (NYC) in Perspective

Perspective Tutorial: Guggenheim Museum in New York city
Do you feel intimidated when drawing freehand organic buildings? In this article, I am using the Guggenheim Museum as an example to guide you through the drawing process. After reading this, you will learn how to draw curved forms in perspective from scratch. Let’s dive in!
Introduction: Guggenheim Museum, New York City
The Guggenheim Museum in New York City is an architectural masterpiece designed by the famous American architect Frank Lloyd Wright. First opened in 1939, this building looks like a white ribbon rolled into a cylindrical shape from the street.
Despite the aesthetic Babylonian-temple-inspired design, this work of art gave the builders headaches during the construction stage. They had to develop new constructive methods and used 3 types of concrete for the different stages of the project.
This video below shows the full perspective drawing process as close to real-time as possible so that you can grab your own pen or pencil, follow along and draw with me.
In this tutorial, we’ll roughly follow a 6-step process taken from one of the tutorials in my third book Draw Like an Artist: 100 Buildings & Architectural Forms.
Drawing Tip
You can download a related book page with extra worksheet and reference image here.
Step 1: Setting Up a Perspective View
First of all, we start with a pencil to set up the perspective view and the basic composition structure.
Draw a horizon line in the lower third of your canvas and position your main vertical line roughly in the left third of your page. That is the edge of the imaginary smaller box on the left.

Estimate the orthogonal converging to the right vanishing point.
Draw two bounding boxes for the main rounded volumes of the museum as shown on the step 01 from the book tutorial.
At this point, pay attention to the proportions of the two boxes in terms of their height, width, and depth, as well as their mutual relationship. You might need to adjust the proportions as you go. This is when the reference image comes in handy as you go back and forth to replicate what you see.

Draw a human figure to anchor the scale of the sketch
Step 2 : Drawing Building Outline
Once the imaginary boxes are sketched out, it is now much easier to draw the main outlines of the building.
To begin, start with the lower third of the volume with a common plinth where the other two volumes sit. Then move on to the main rounded volume of the museum and divide it with 3 horizontal gaps, and create stripes that cut into the volume.

Pay attention to the angle of the conical shape and thickness of the 4 discs.
Keep in mind the proportions of the 4 discs. The top one has the biggest thickness and straight vertical edge around, while the 3 layers beneath it have more angled edges.
Drawing Tip
Work on all parts at the same time
I have a habit of jumping around from one part of the drawing to another. This ensues that I am not bogged down into just one detail of the drawing while completely ignoring the rest. This way, the sketch gets developed in a more coherent way.
Step 3 : Fill in the Smaller Shapes
Use the established lines to draw new elements by comparing their position and alignment with each other.
Double-check different touchpoints of the building’s parts. At this point, you need to trust your own eyes by visual measuring the proportion lines and make sure you are still on the right track.
This process will get easier and easier for you through practice. The more you draw, the more you can relate to the new lines and objects you’re adding to the composition.

Fill in the smaller details and add some context once the main building outline is completed.
Step 4: Tracing with Ink
Congrats, you have just gone through the hardest part! Now, it’s time to trace the drawing with single confident lines to create the final line work.
I’m using my touch file liners, but feel free to use your own favorite tools. If you’re interested to learn all the tools I use, I have shared them in this article: My Essential Drawing Tools. Check them out!

Gently erase the pencil drawing beneath once the ink has dried out.
Step 5: Add Texture and Shading
Moving forward, we’ll be adding textures and shading to add more contrast and elasticity, as well as supporting the illusion of three dimensional space.
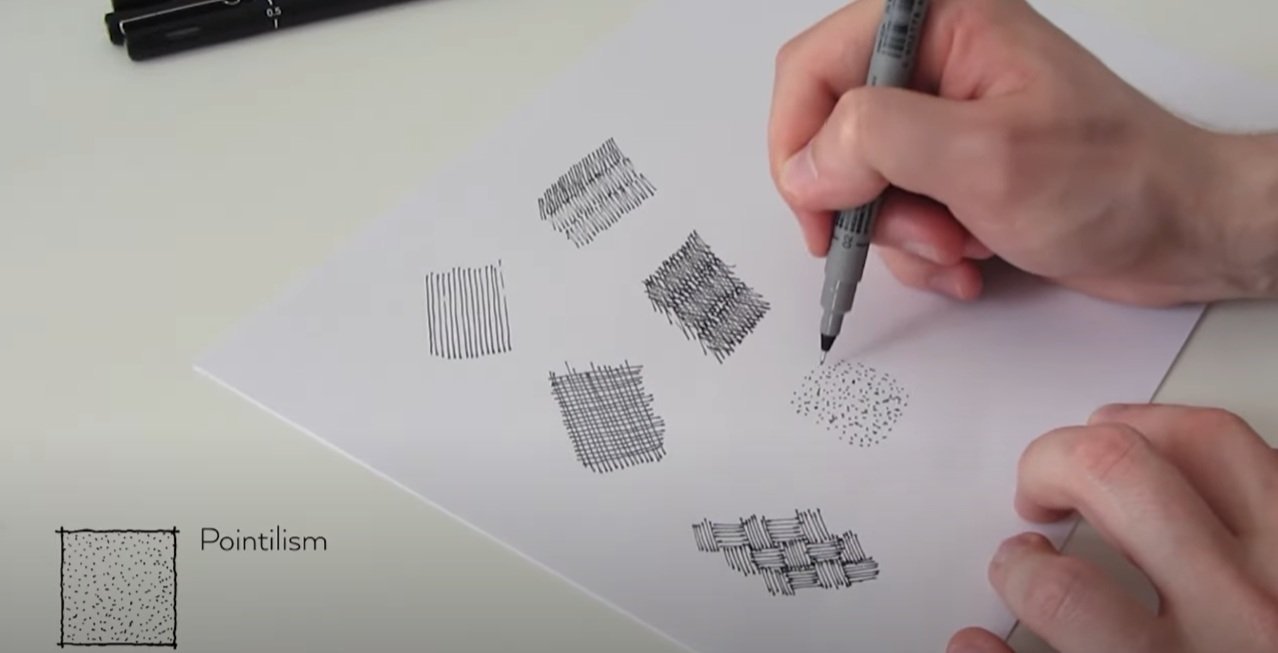
You can use simple techniques like hatching, crosshatching, pattern, pointillism and similar techniques. In my beginner’s course, I cover them in details n how to add suggestive textures to the windows facade and the surroundings.
Use hatching to suggest the texture of the building.
For example, if you have observed how most windows look during the day, they seem pretty dark with bits of reflections. This can be suggested and simplified through simple hatching with the while stripes to mimic light reflections.

Use solid to dashed and dotted lines to suggest the light source.
Final Step: Adding Context
This is the step where we add human figures and vegetations to suggest the surrounding context.
Add more people to the composition far away from the viewer around the entrance. Simply render them as silhouettes since they’re quite a distance away.
To add more contrast to the drawing, I’m using a brush pen to render the recessed parts or the divisions of the rotunda in black.

You can also add one more layer of pencil shades to soften the shading.
For final touches, you can post-process your drawing digitally, or paint it in watercolor.

Guggenheim Museum New York in watercolor.
I have prepared a PDF worksheet that can guide you through the step-by-step if you want to draw along with me. In this PDF guide, there is a worksheet and a reference image that will make the whole process a whole lot easier. Have fun sketching!
Save this pin for future reference! 👇
