
Draw 1-point Interior Perspective on Ipad for Beginners / 7 Easy Steps
ARE YOU A BEGINNER IN DRAWING PERSPECTIVE? FOLLOW THIS 7-STEP GUIDE
In this article, I am drawing an interior space of a home in 1-point perspective. I’ll guide you step-by-step through the process. This is especially helpful if you are a beginner in sketching, because by the end of this blog post, you’ll be more confident in drawing perspective while learning all the fundamentals. Let’s get started !
For a beginner in perspective drawing, there might be lots of unanswered questions. E.g. What do the grid lines suppose to mean? How to keep everything in the right proportion? How to make it look more realistic?
Since perspective drawing is the closest visual projection to how we - as humans - see and experience the world, it’s especially important for architects and designers to communicate and explain their ideas in perspective so that their clients (and other involved parties) can easily understand them.
In this blog article, you’ll learn my step-by-step drawing process plus a few tricks in Morpholio Trace app on iPad which assists me with the drawing in this example.
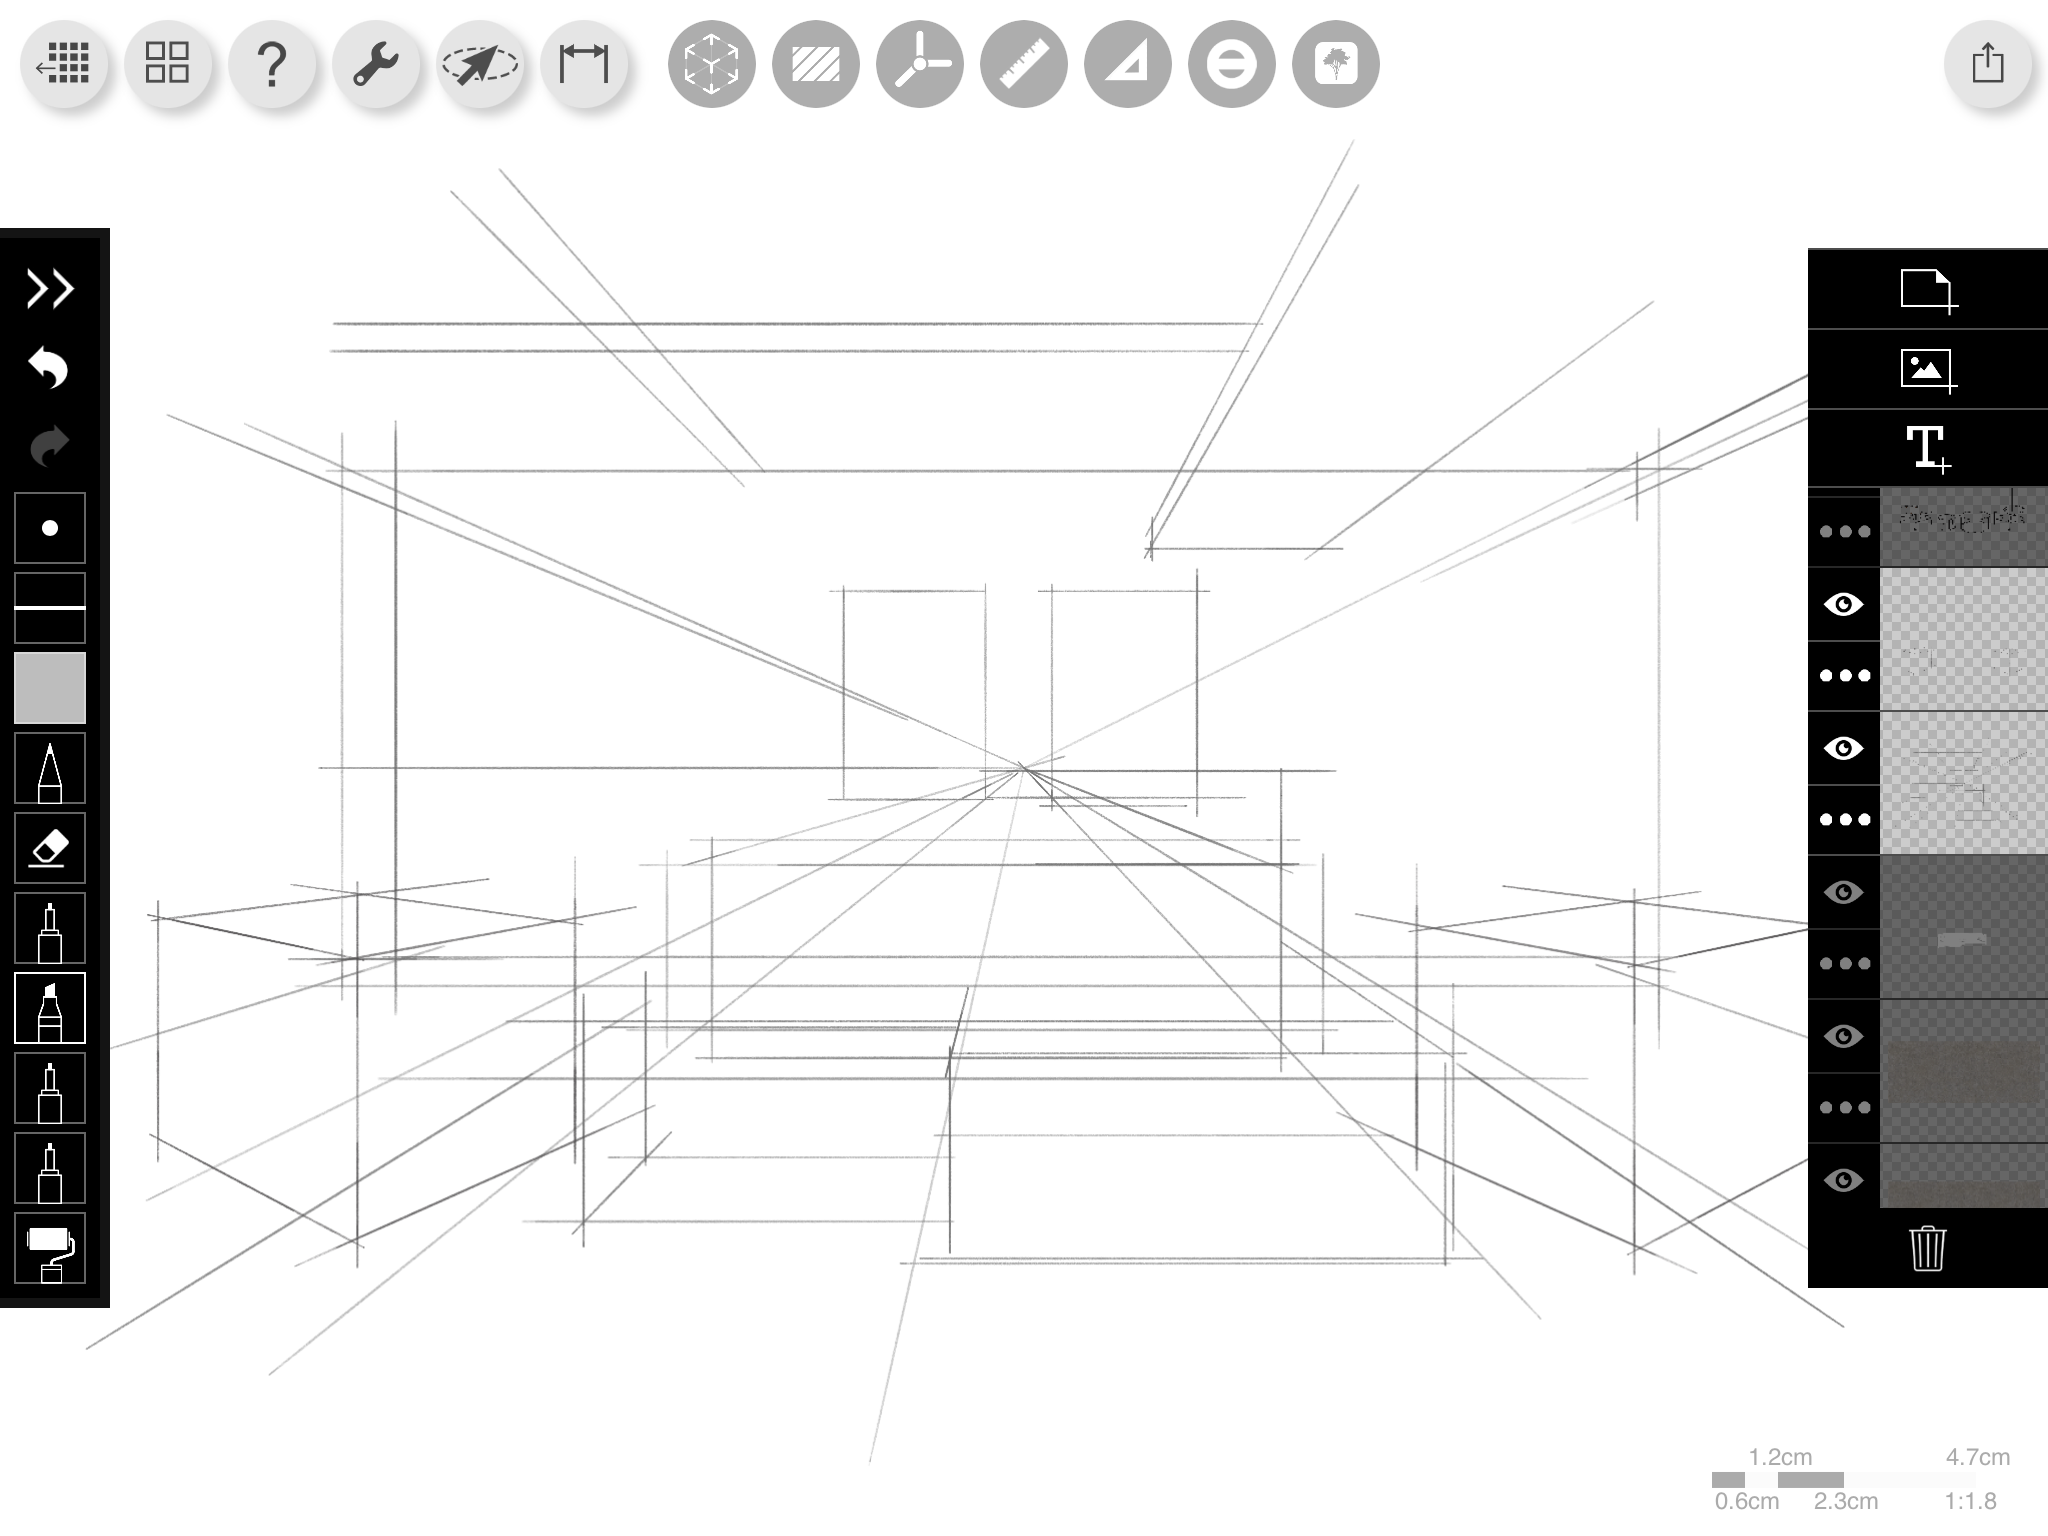
Step 1 : Set Up the Structure
Start by drawing the Horizon Line (horizontal line in eye-level ) across the page, and draw a cross (main Vanishing Point) at the center of this line. Then draw a big rectangle indicating the back wall of the room. To draw the other four sides of wall, simply drag a straight line from the vanishing point and go past each of the wall’s corners.

Interior Perspective Drawing Step-by-Step
If you are using Morpholio Trace, this can be done easily with just a click. You can quickly set up your composition structure using a perspective grid tool and light grey pencil brush.
A big advantage of digital drawing on iPad is the option of ‘drawing assistance’ which keeps your lines aligned with the perspective grid you set up so that your lines are always precise.
STEP 2 : Bounding Boxes
I love to use the bounding box technique to help me keep the perspective and proportions of all the objects right. In this case the sofa, coffee table and other furniture in the room. First think of what are the biggest elements and key objects you want to include in this space, then simply draw boxes along the perspective grid to define their outlines and indicate their placement.
The result will look something like this :
Step 3 : Wall Texture
To show the texture of the wall, add a new layer with an image texture of your choice for the back wall. Then move this new layer under the initial pencil sketch. Adjust the transparency level if necessary.

Step 4 : Inking
Add a new layer for inking on top of the initial pencil sketch. In Morpholio Trace, you can use an inking brush set to black colour. Then take advantage of the perspective grid assistance, smart ruler and protractor to draw straight lines and ellipses.

Step 5 : Filling
It is time to fill in the space with colors and materials! On a new layer, use the smart fill tool to block out solid white areas of the ceiling elements and the sofa. This way, the outlines of the key furniture are more obvious even without the perspective grid.

Then use the roller brush to add your desired color & texture to the beams and sofa. I also added abstract art paintings on the back wall.

Step 6 : Highlight & Shading
Light and shadow add more plasticity and depth to the space, resulting in a more realistic drawing. How to achieve that? It is very easy, simply use white and darker grey color.
In Morpholio Trace, you can adjust the opacity of roller brush and eraser to achieve this realistic effect.
First, with the roller brush, use white colour to add highlights, and darker grey for shadows. Then on a new layer, select the eraser, lower its opacity, and subtly eraser parts of shadows to create smooth shaded gradient.
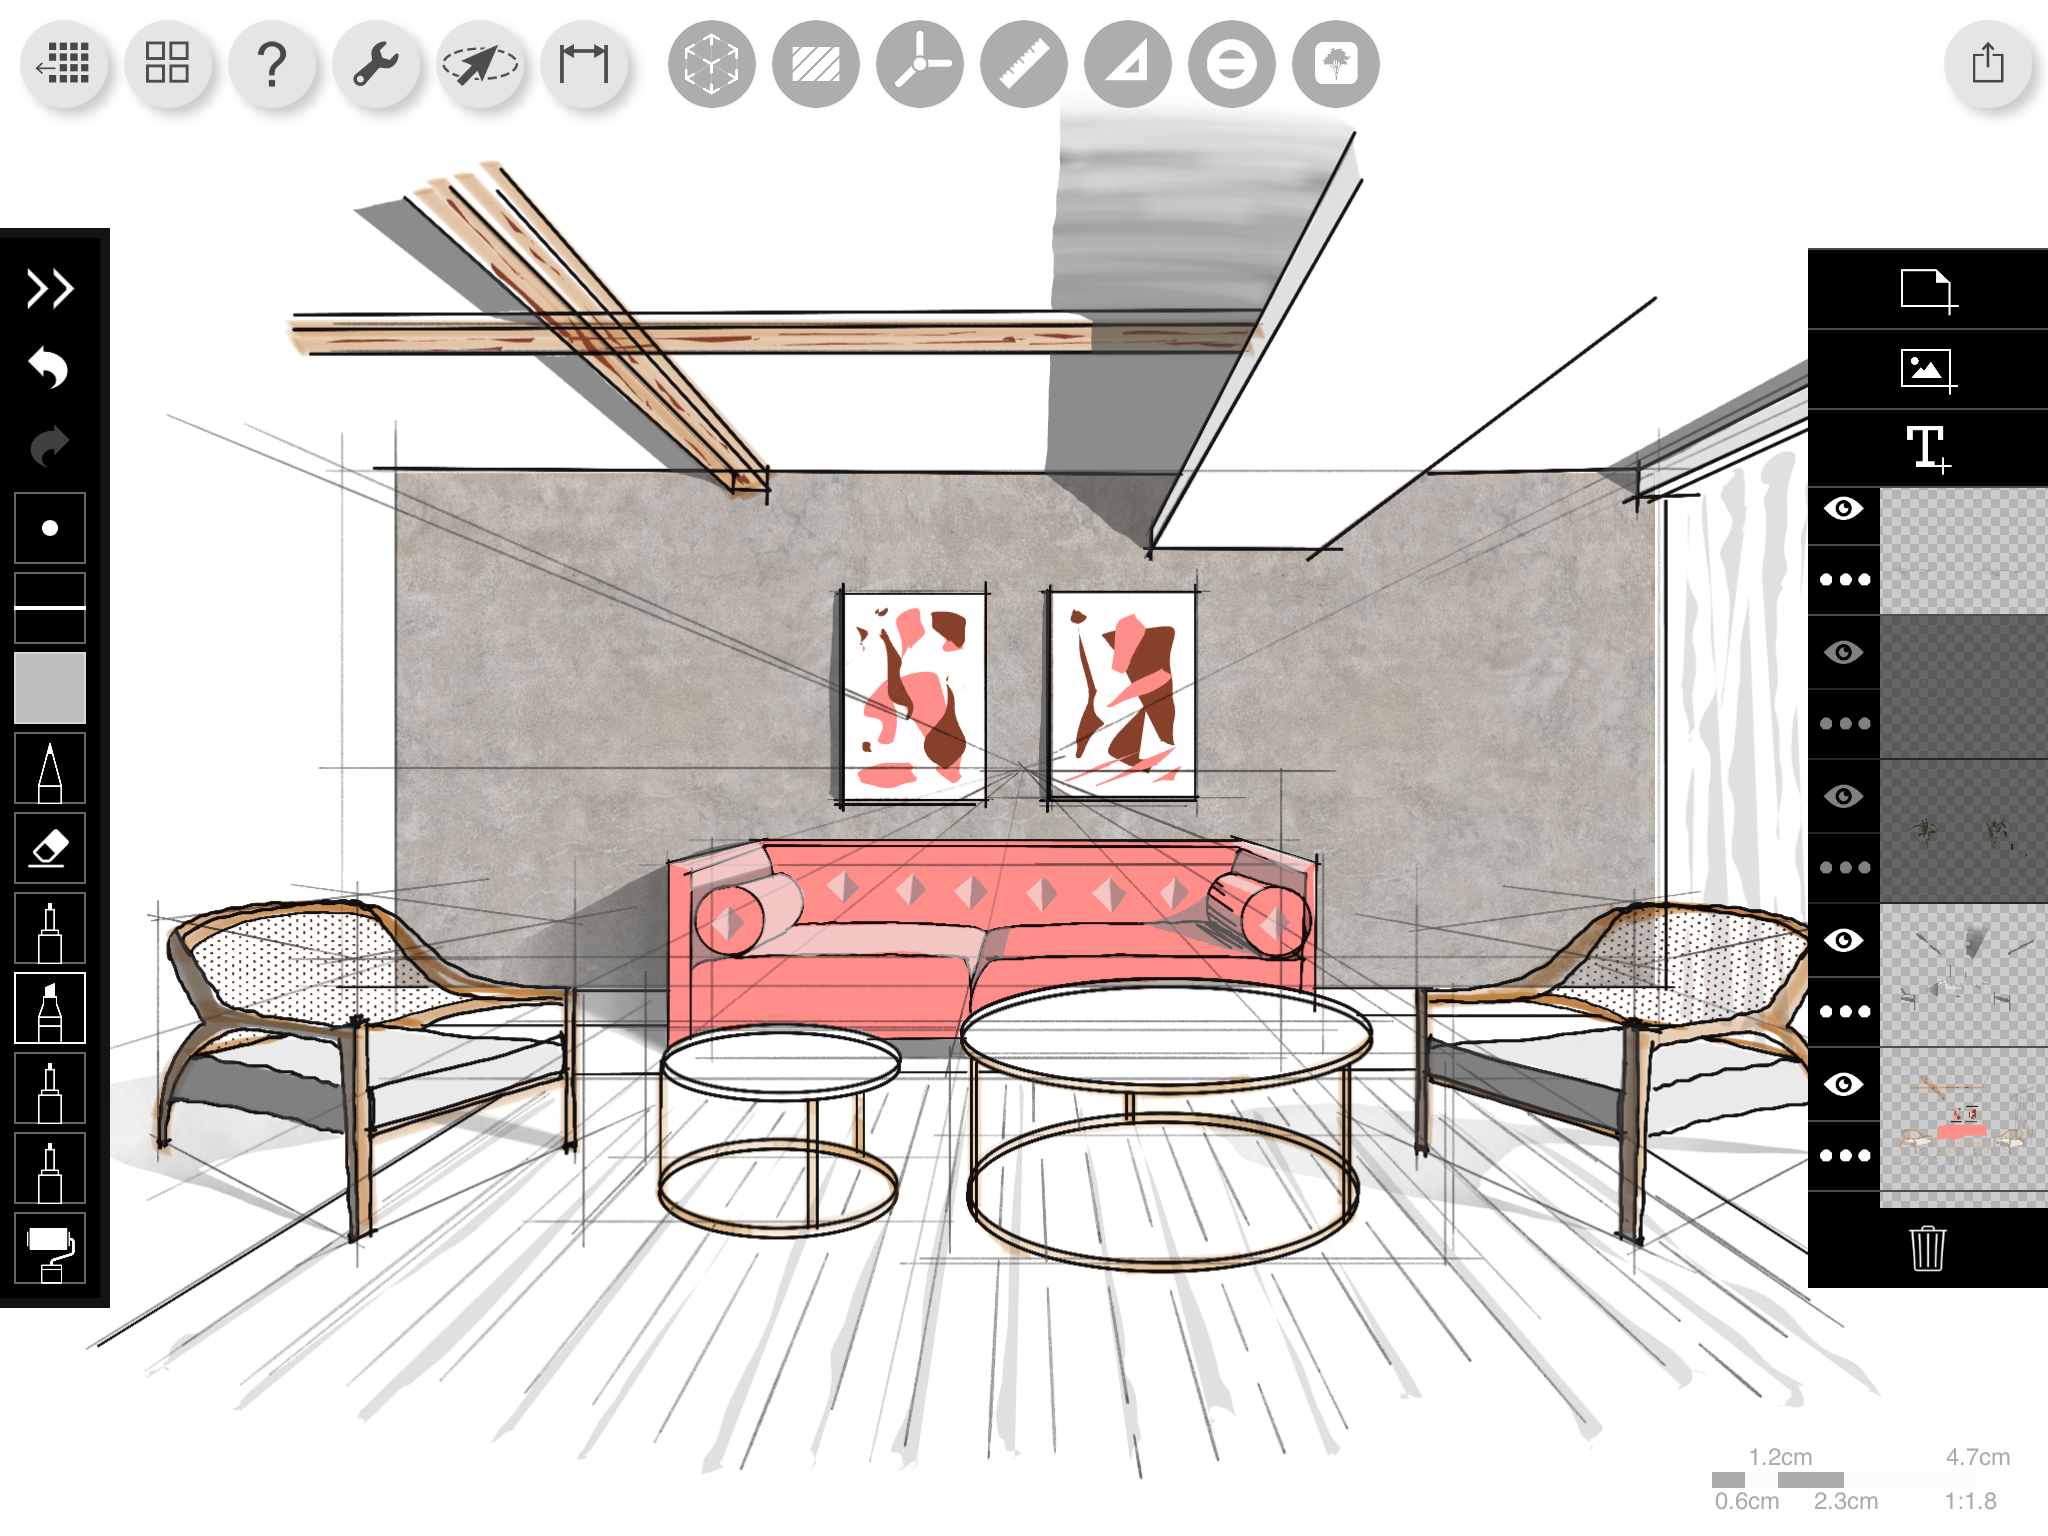
Step 7 : Final Touch
Lastly, I use the same technique with the roller brush to free-hand draw plants next to the sofa. To add highlights and shades, I played around with the lighter and darker shades of green.
And then… Voila! The final outcome looks like this :

If you find this blog post helpful but still need more in-depth instructions, I have also prepared a PDF Guide with all the steps explained in detail for you to download, completely FREE. All you need to do is to click the button below to download it.


Save this pin for inspiration!